

LaserPecker
Christmas Tree Paper Sculpture
How-to
- Machine
- LX1
- Material
- Paper
- Size
- 210 x 297 mm
- Material Information
- Green Cardstock Paper, Yellow Cardstock Paper
- Software Used
- LaserPecker Design Space PC
- Production Time
- 30 min
- Engraving Difficulty
Design Files

2023/12/15 15:1014
Introduction
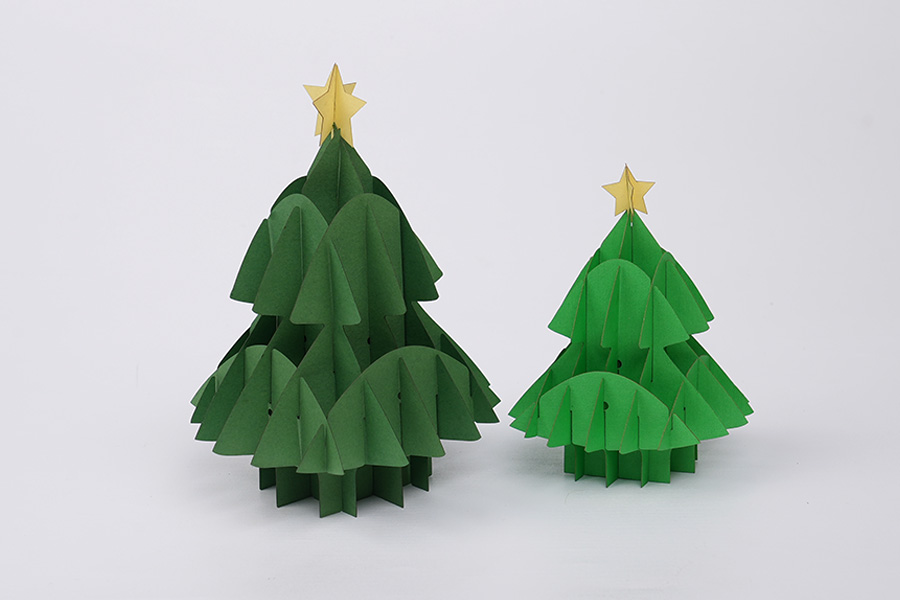
Create your own stunning Christmas tree paper sculpture with these simple steps.
How-to Tutorial
Step1: Cut Green Tree Pieces
Begin by placing green paper on the cutting plate. Open the file for the tree, adjust the focus, verify the size, preview the position, and determine the engraving parameters. Once everything is set, proceed to start cutting.
Settings 1
LinePaper
- Engraving Method
- Line
- Material
- Paper
- Power
- 100%
- Depth
- 10%
- Pass
- 1
- Acceleration Level
- 1
- Module Type
- 20 W 450 nm
Step2: Cut Yellow Star Pieces
Now, place yellow cardboard on the cutting plate and open the file for the star. Begin the cutting process.
Settings 1
LinePaper
- Engraving Method
- Line
- Material
- Paper
- Power
- 100%
- Depth
- 10%
- Pass
- 1
- Acceleration Level
- 1
- Module Type
- 20 W 450 nm
Step3: Assemble the Paper Pieces

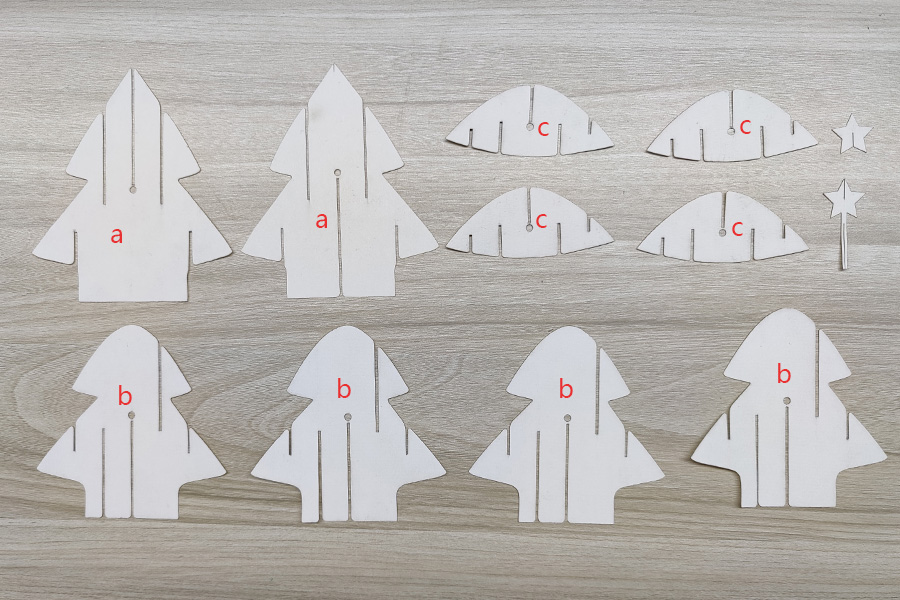
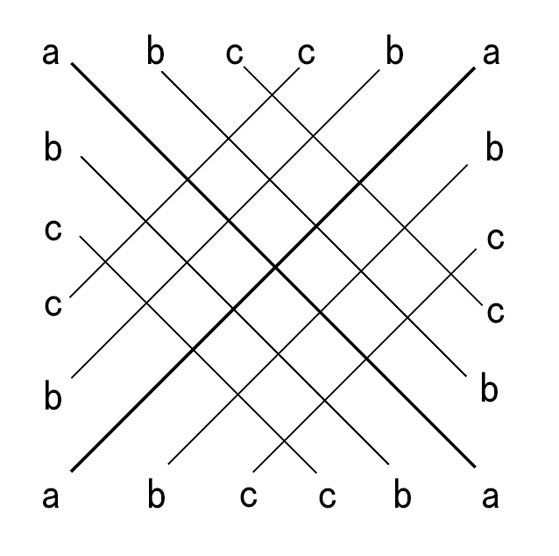
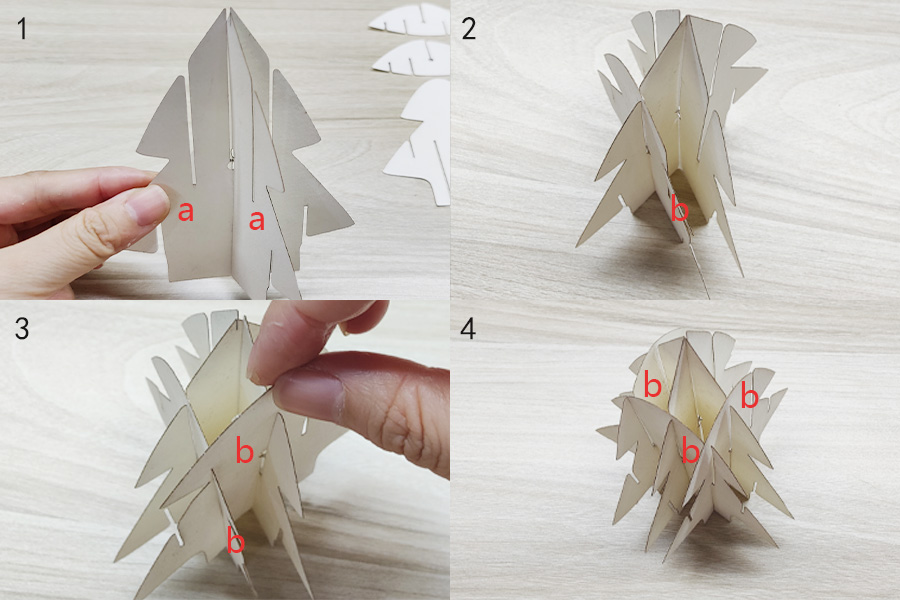
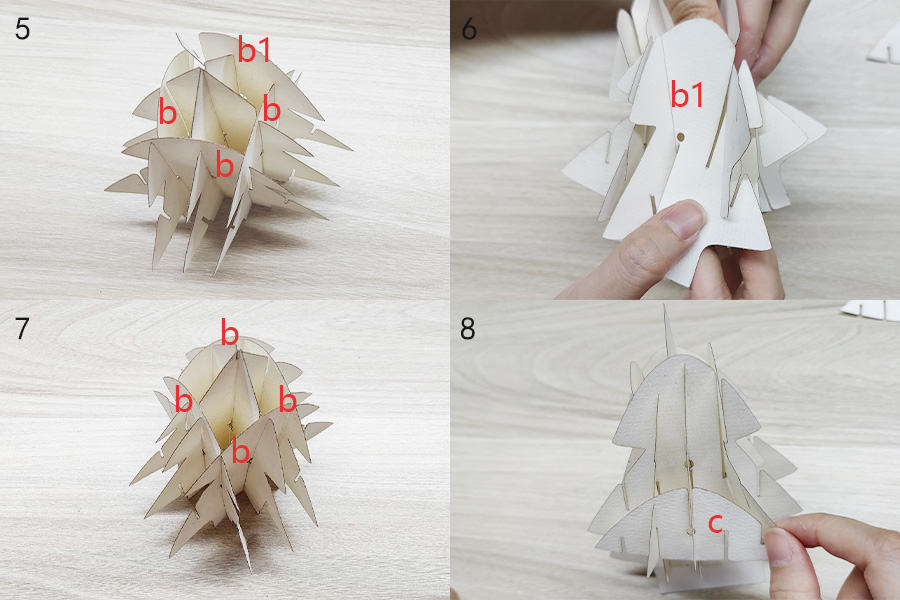
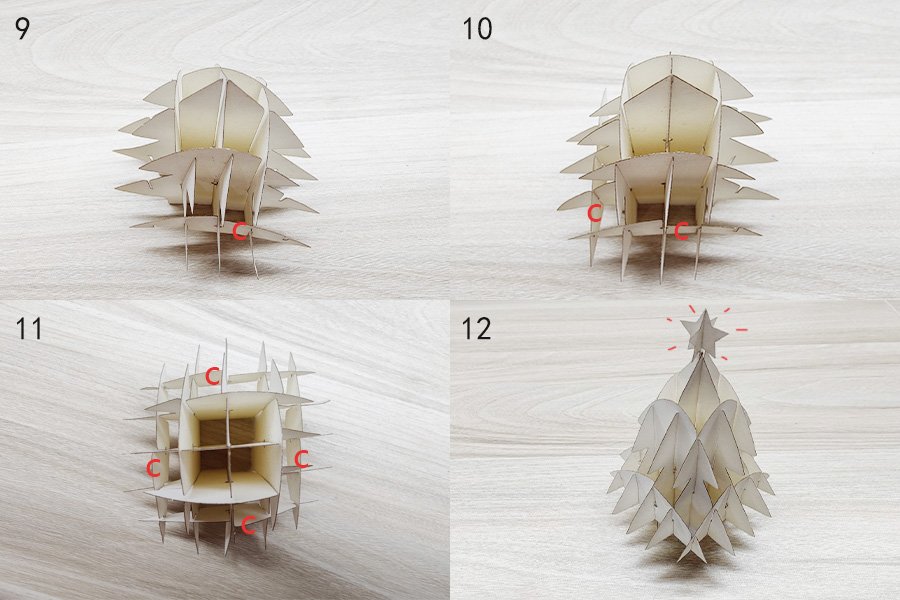
Assemble the paper pieces according to the steps shown in the accompanying picture. Following these steps will result in a complete Christmas tree paper sculpture.
Note that if you're using different materials, you may need to adjust the parameters accordingly.
Christmas
Christmas Tree
Decoration
Paper Sculpture

Comments